
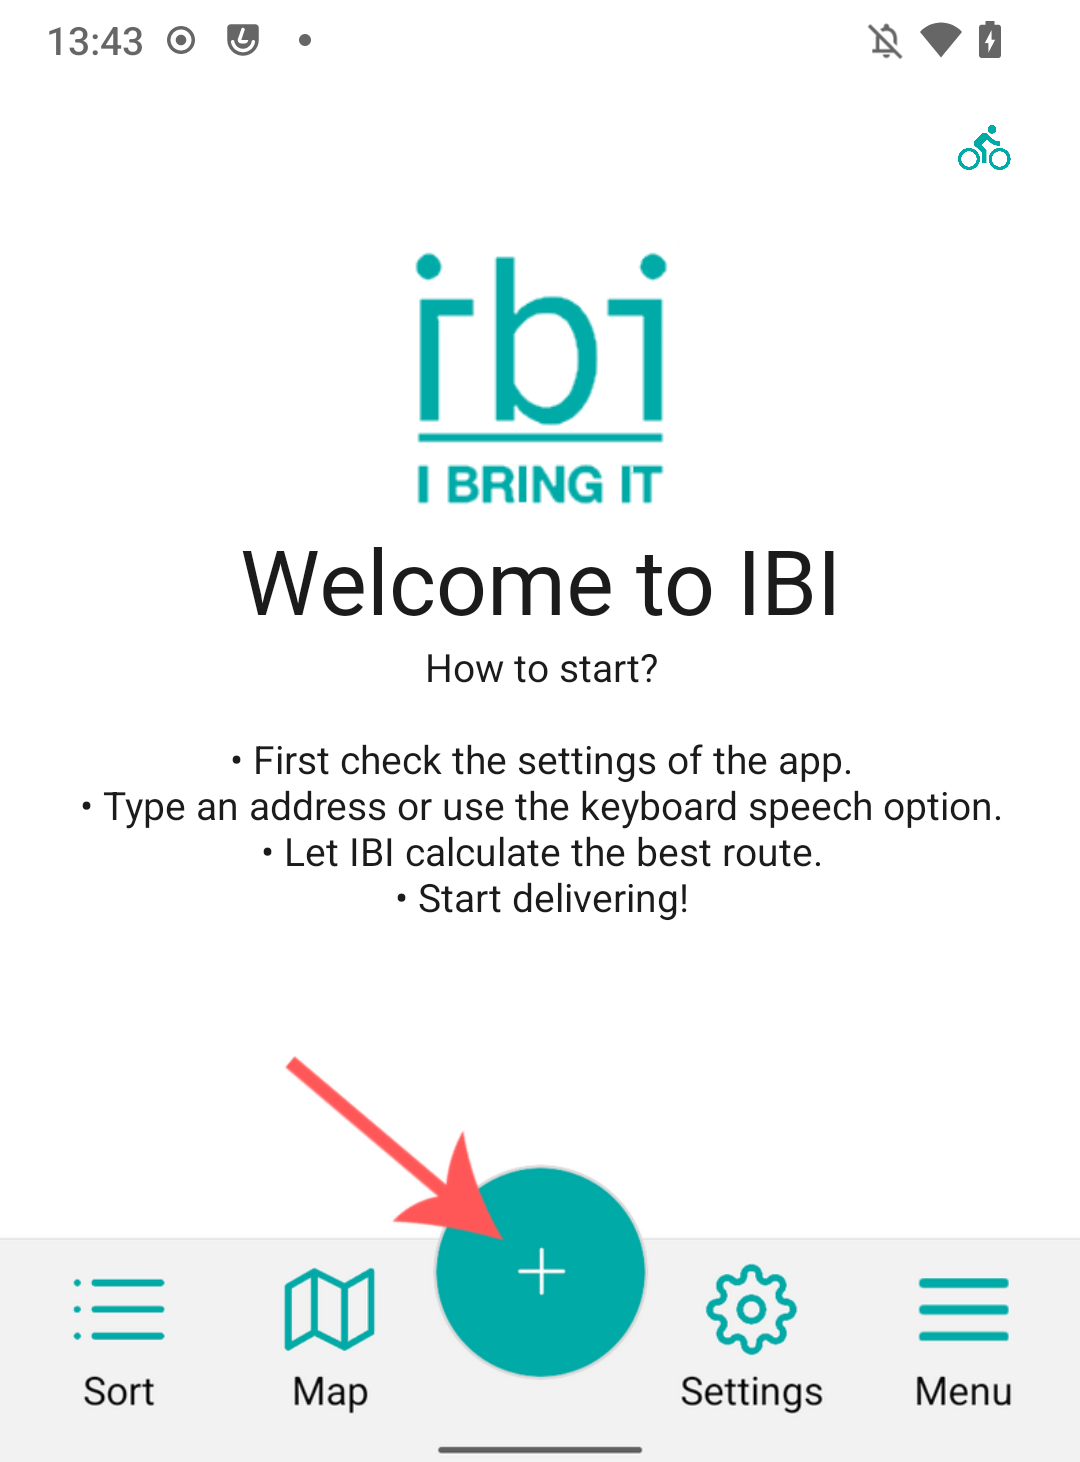
Don’t have time to sit around and read the full manual? This quickstart tutorial will teach you all the important features of IBI so you can start delivering immediately!
Adding addresses
IBI currently supports three ways of manually adding addresses:
- Simply typing an address name.
- Scanning addresses on clearly printed labels with your phone camera.
- Entering an address with your voice.
To start adding an address to your list, press the PLUS button.
Then, after having added all your addresses, you can simply swipe down or click the SORT button to sort the list of addresses and calculate the best route between them.
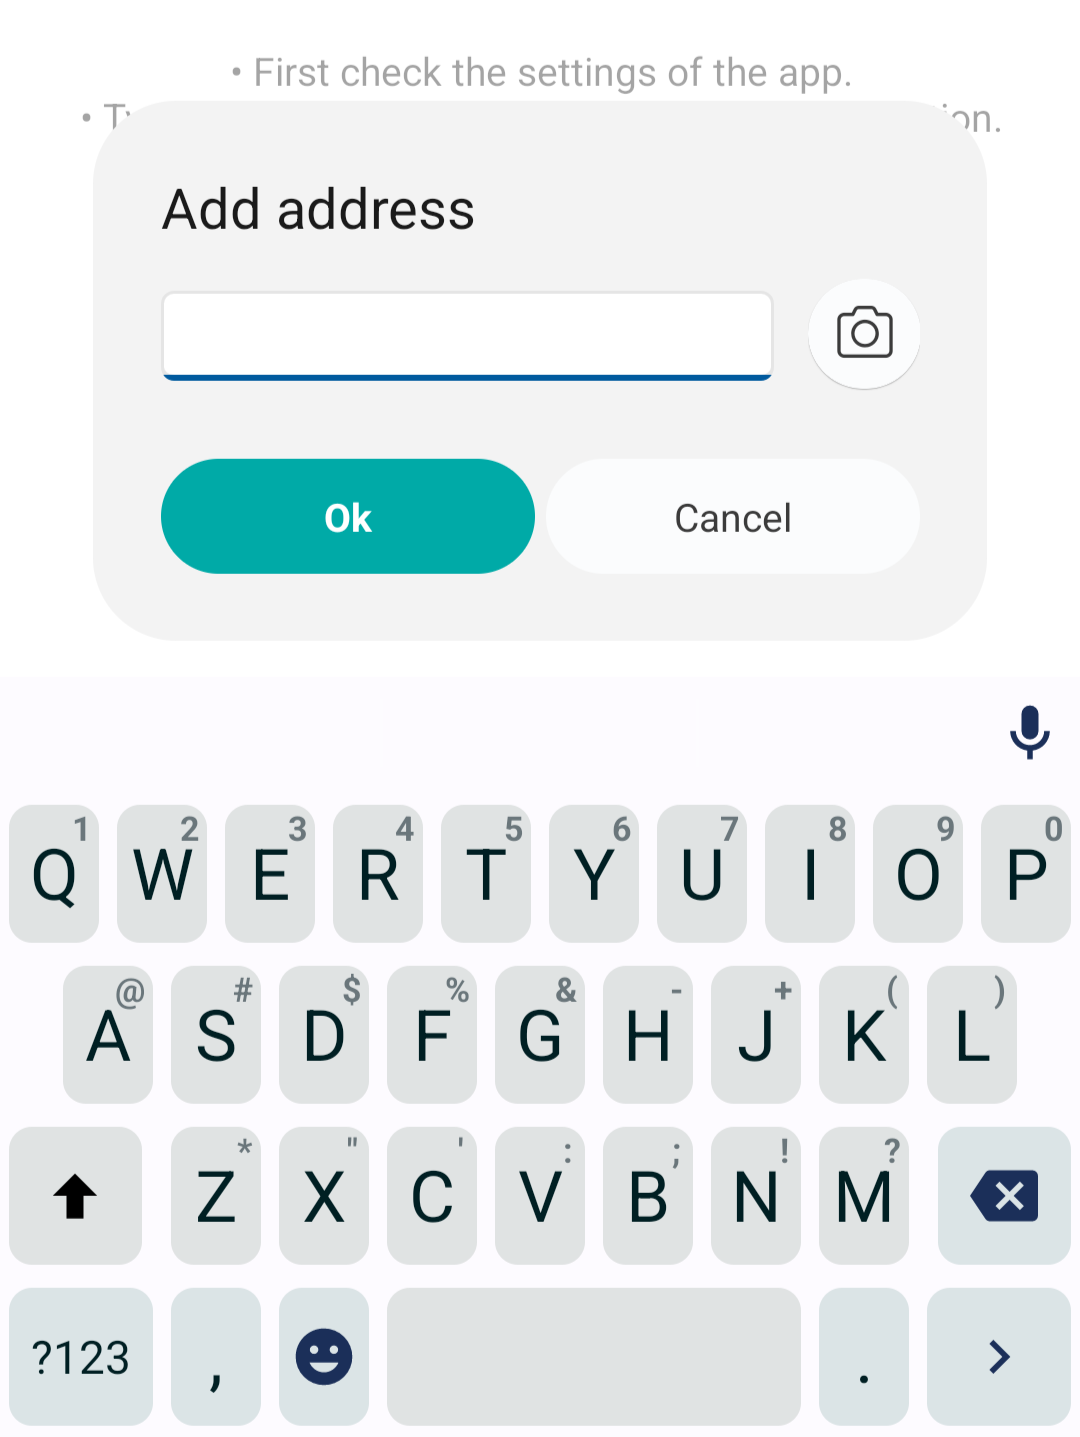
1. Typing an address
Use the text box to fill in your address in the following manner:
Street name, house number, city, postal code (optional).
IBI automatically suggests addresses based on what you are typing, so no need to fill in the address completely.
After typing in an address, simply press OK to add it to your list.
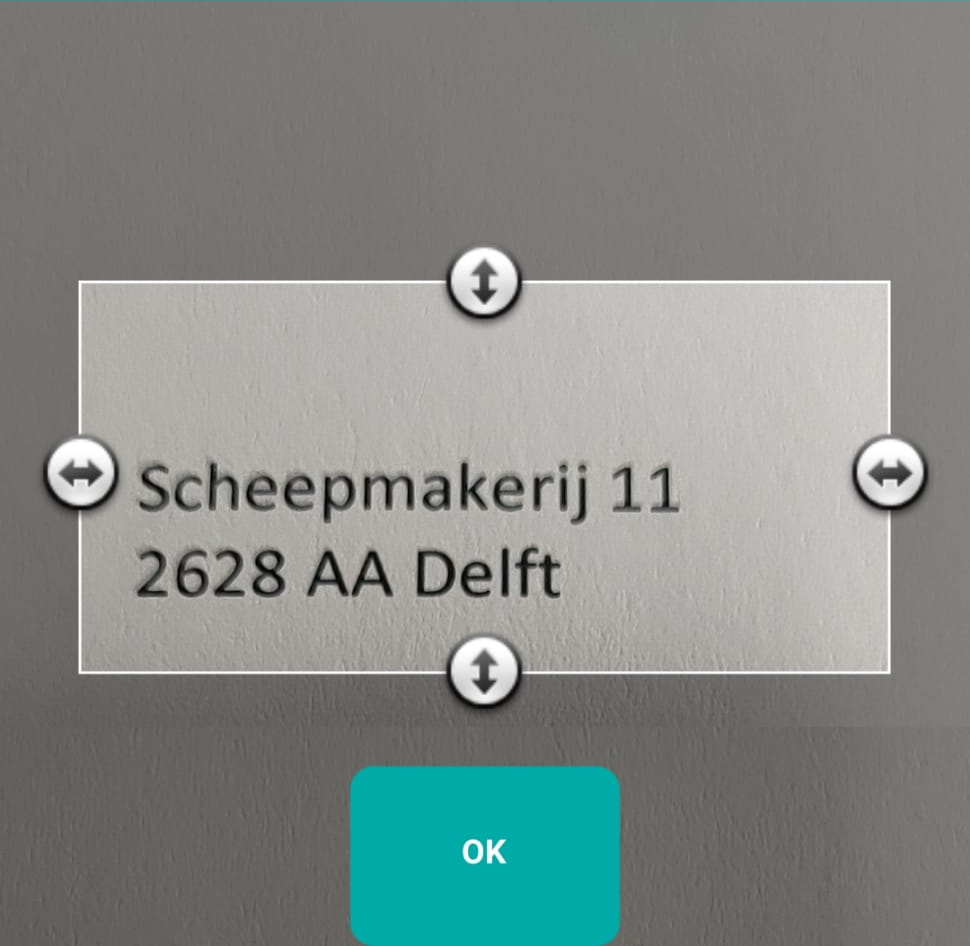
2. Scanning an address
IBI allows users to scan an address by taking an image on paper, package, or similar, and automatically analyzing the address contained in the image.
To start scanning, press the camera button next to the text box.
Center the scanning area on the text and press OK. You can increase or decrease the scanning area with the arrows around the area.
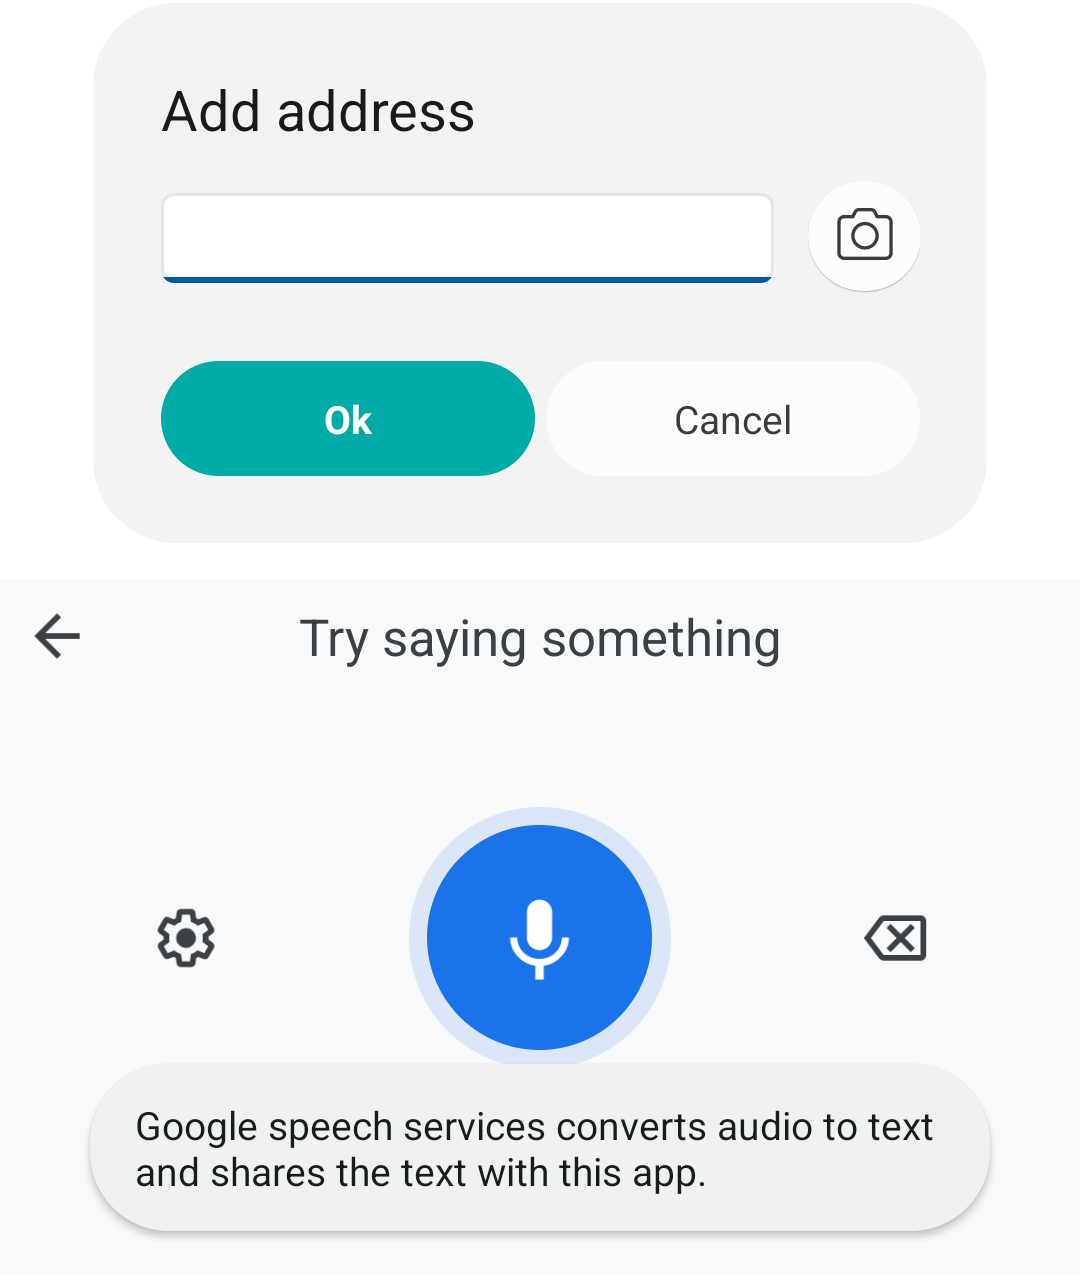
3. Entering an address by using your voice
Instead of typing an address, you can also use your voice for simply speaking the address out loud. To start, press the microphone button on your keyboard.
Record the address in the following way: Street name, house number, city, postal code (optional).
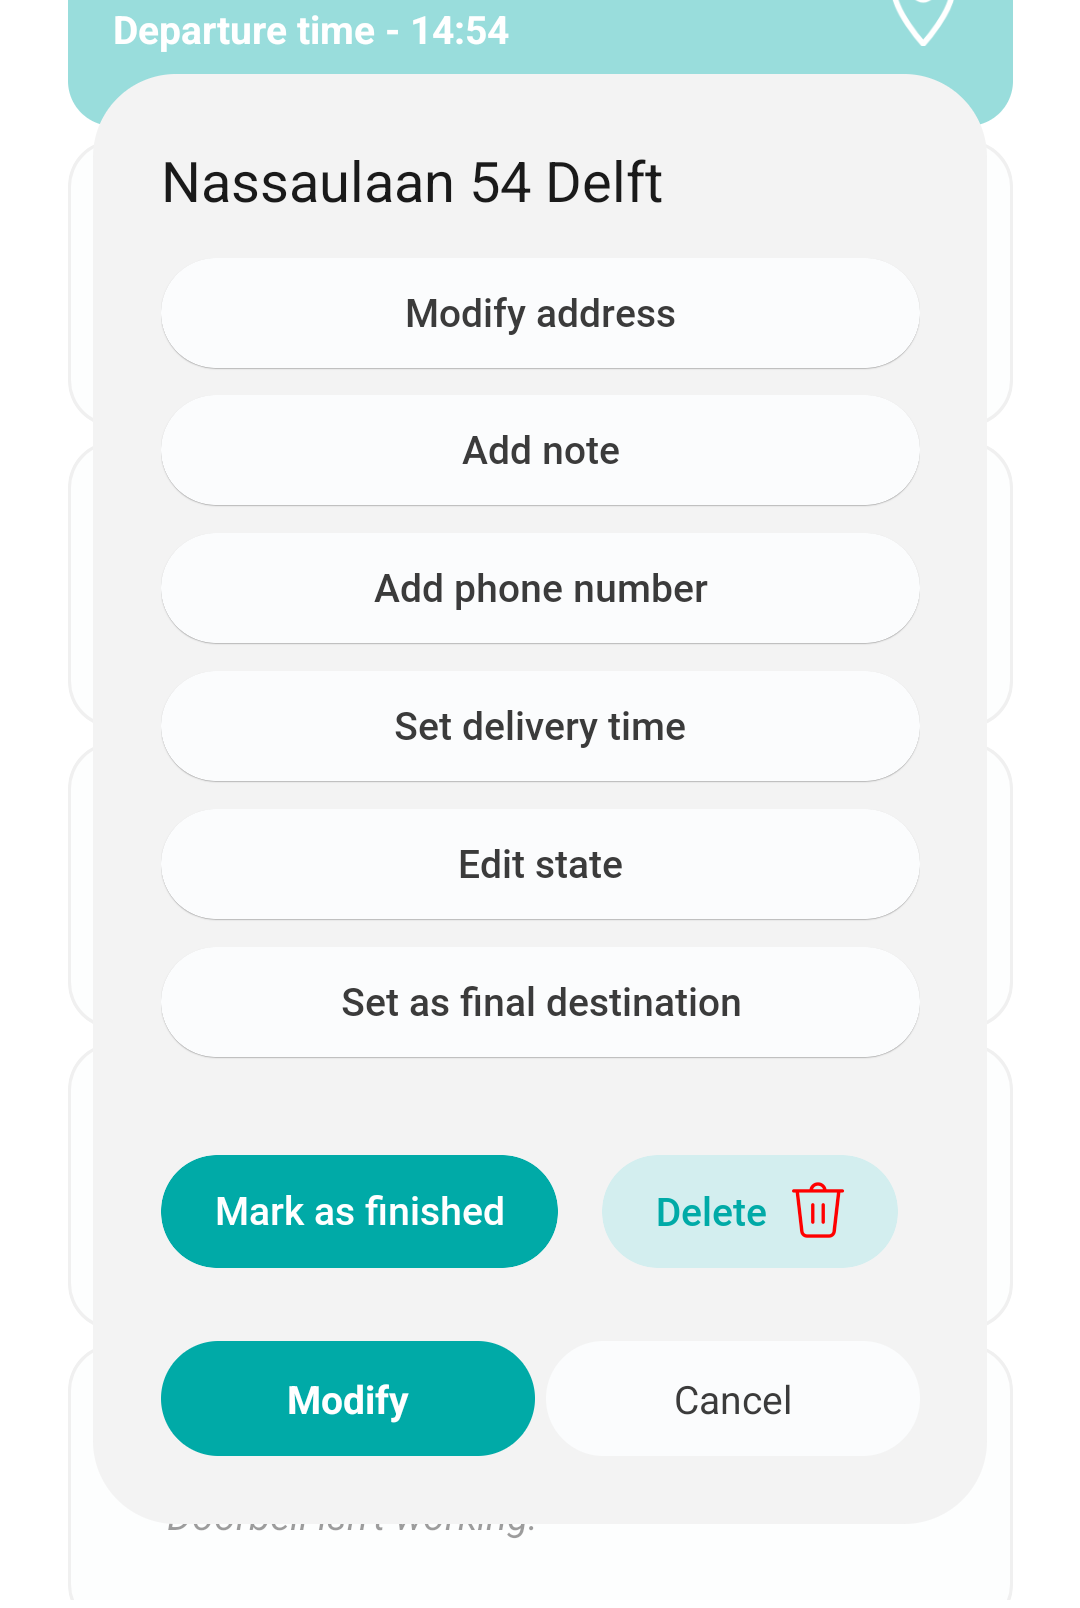
Modifying an address
After adding a couple addresses to your list, you might want to add more details to it, such as phone number and delivery time. To do this, simply press the address you want to edit. A list appears with multiple options:
- Press Modify address to modify the address.
- Press Add note to add or modify a note.
- Press Add phone number to add or modify the phone number.
- After having added a phone number two new buttons will appear:
- Call allows you to call the number.
SMS allows you to send a message to the number.
- Call allows you to call the number.
- After having added a phone number two new buttons will appear:
- Press Set delivery time to add or modify the delivery time.
- Press Edit state to edit the state of the address to either ‘open’, ‘finished’, ‘not at home’, ‘at neighbours’, ‘not delivered’, or ‘different’.
- Press Set as final destination to mark this address to be the final address on your route, which IBI will remember when calculating the best route.
- Press Mark as finished to mark this address as finished.
- Press Delete to completely delete this address from your list.
- Press Modify for an extensive overview of this address and its data.
Menus
Bottom menu
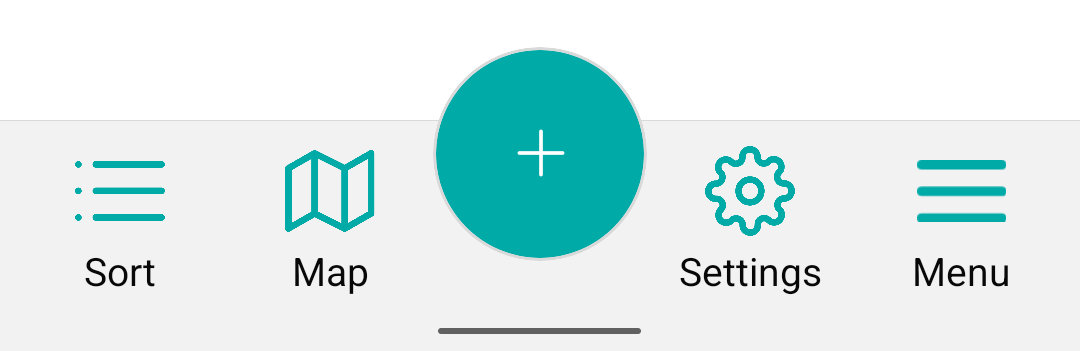
The bottom menu appears at the bottom of the screen, and can always be used to navigate to the main pages of IBI:
- List takes you to your list page.
- When on the list page, the Sort button will appear, which sorts the current list
- Map lets you view your addresses on the map
- The PLUS button lets you add an address to your list, as mentioned before.
- Settings takes you to the settings page.
- Menu opens the side menu.
Side menu
To open the side menu, simply press the ‘menu’ button on the bottom right of the IBI screen. A flyout menu appears:
- Clear list clears the current address list.
- Send report sends the report.
- Transfer addresses opens the transfer page.
- Receive lists opens the receive page.
- Saved lists opens the page where you can view you saved lists.
- Settings opens the settings page.
- Subscription takes you to the subscription page, where you can see your current IBI subscription and change it if desired.
- About IBI takes you to the about page.
- Help / FAQ sends you to the FAQ page of the IBI website.
