The IBI Transfer & Receive functionality enables you to use IBI in a team. When one of the team members has completed his list of addresses to deliver to for the day, a colleague, that still has some addresses to go, can transfer a part of his list. Select the adresses and send them to a shared team repository. This makes delivering in a team more efficient than ever!
IBI also has the unique feature to send a list of addresses via mail. To find out more about this, go the Mail Address Lists part of the IBI manual.
How does it work?
- You select some or all addresses you want to transfer.
- Select the addresses you want to send to the shared team repository, they will be removed from your current list.
- Your colleague receives this list via the shared repository of delivery lists and selects the transferred list.
- The colleague is then able to add the new addresses to his current list.
- Sort the list for the optimal route, and you and your colleague are ready to go!

Step-By-Step Explanation
Still not sure how IBI Transfer & Receive works? Don’t worry, here is a step-by-step explanation showing you exactly how to send and receive addresses to and from your team repository. You can also watch the YouTube video below!
Transfer
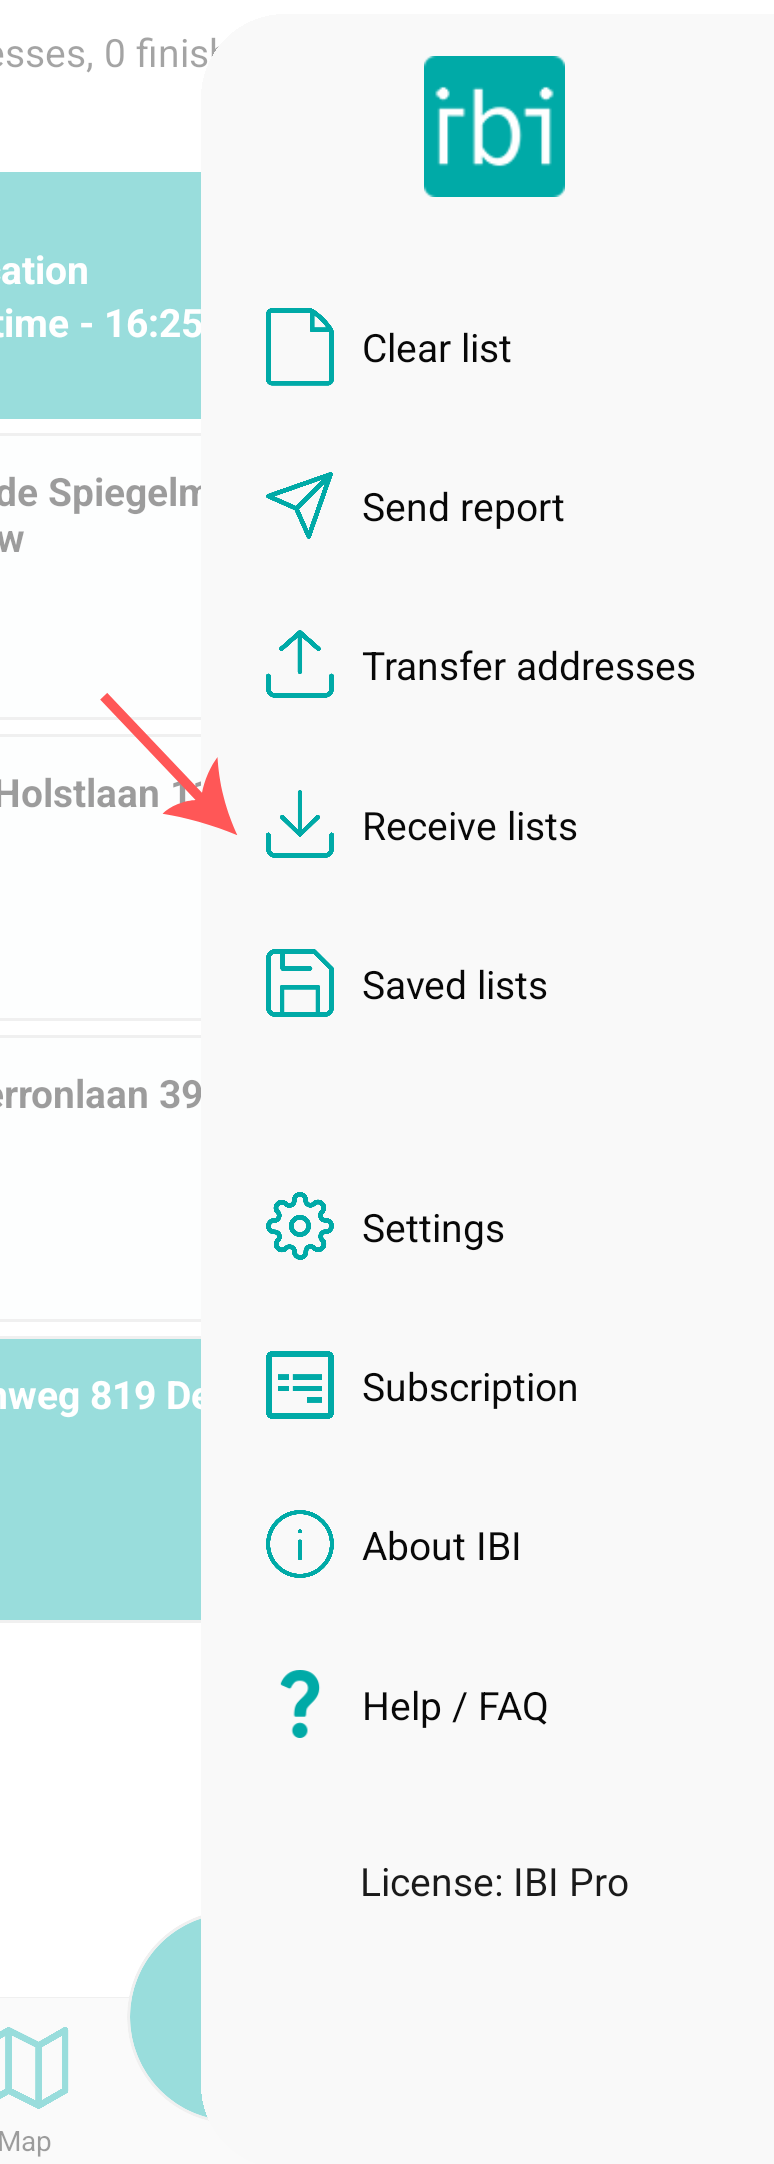
Select TRANSFER ADDRESSES by opening the side-menu, which you can find when clicking on the MENU button in the screen footer.

Select the addresses you want to transfer to the shared team repository and press SEND. You can also select all addresses at once by using the SELECT ALL button.

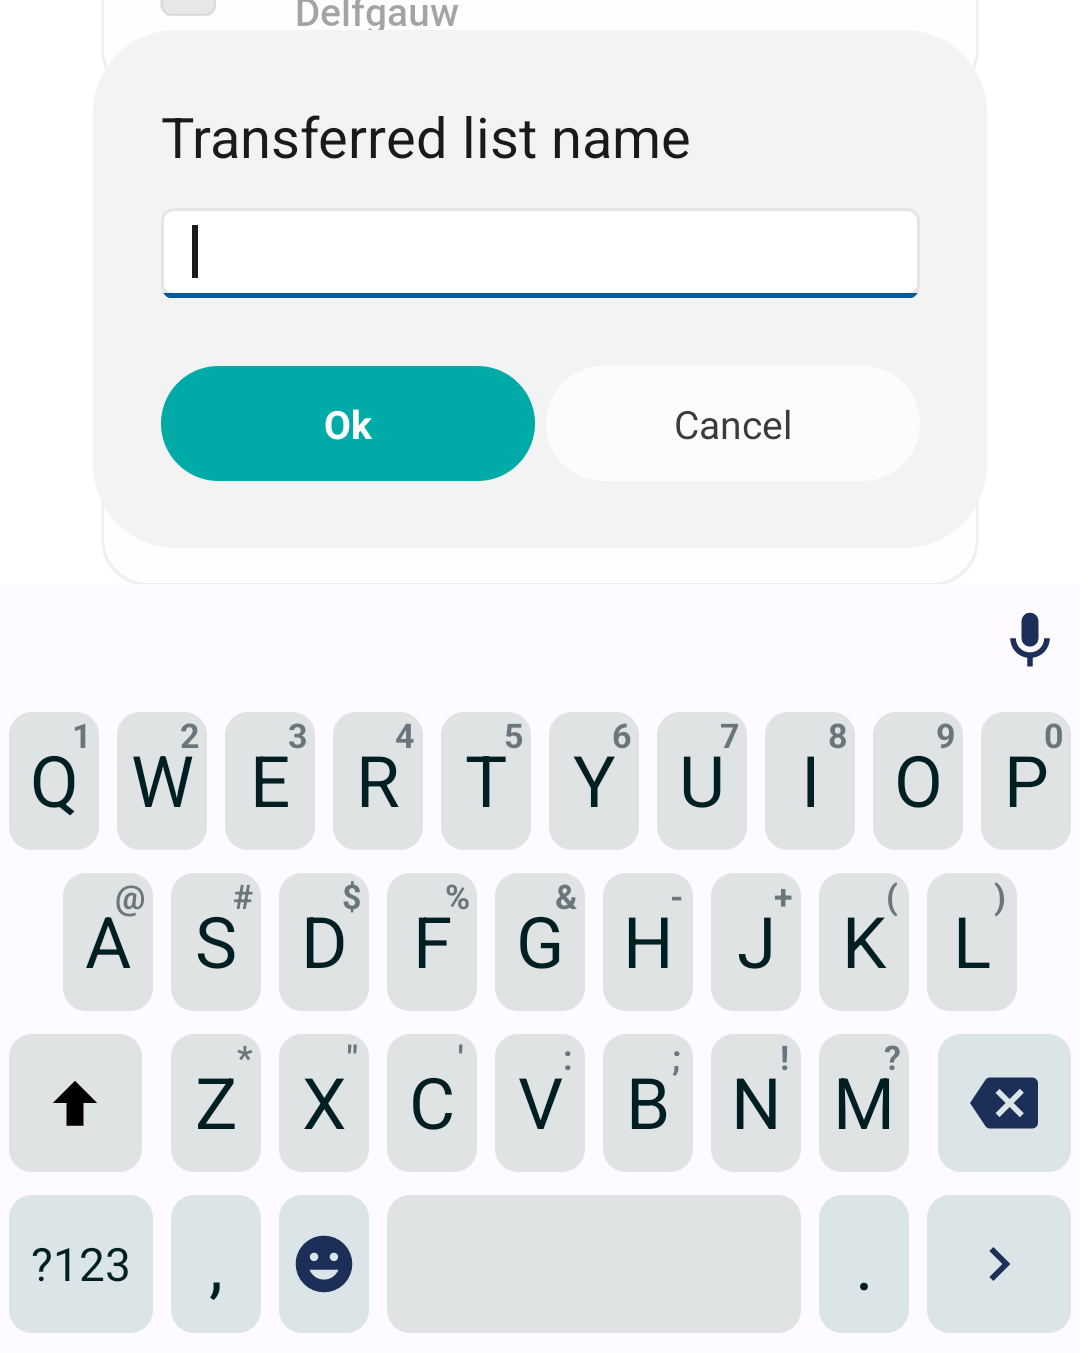
Next, enter a name for the list so your colleagues can easily find it, and press OK.
The selected addresses are now transferred to the team repository. Go to the next section to find out where and how you and your colleagues are able to receive the transferred list.
Receive
Go to RECEIVE LISTS by opening the side-menu again, found by using the MENU button in the bottom right.
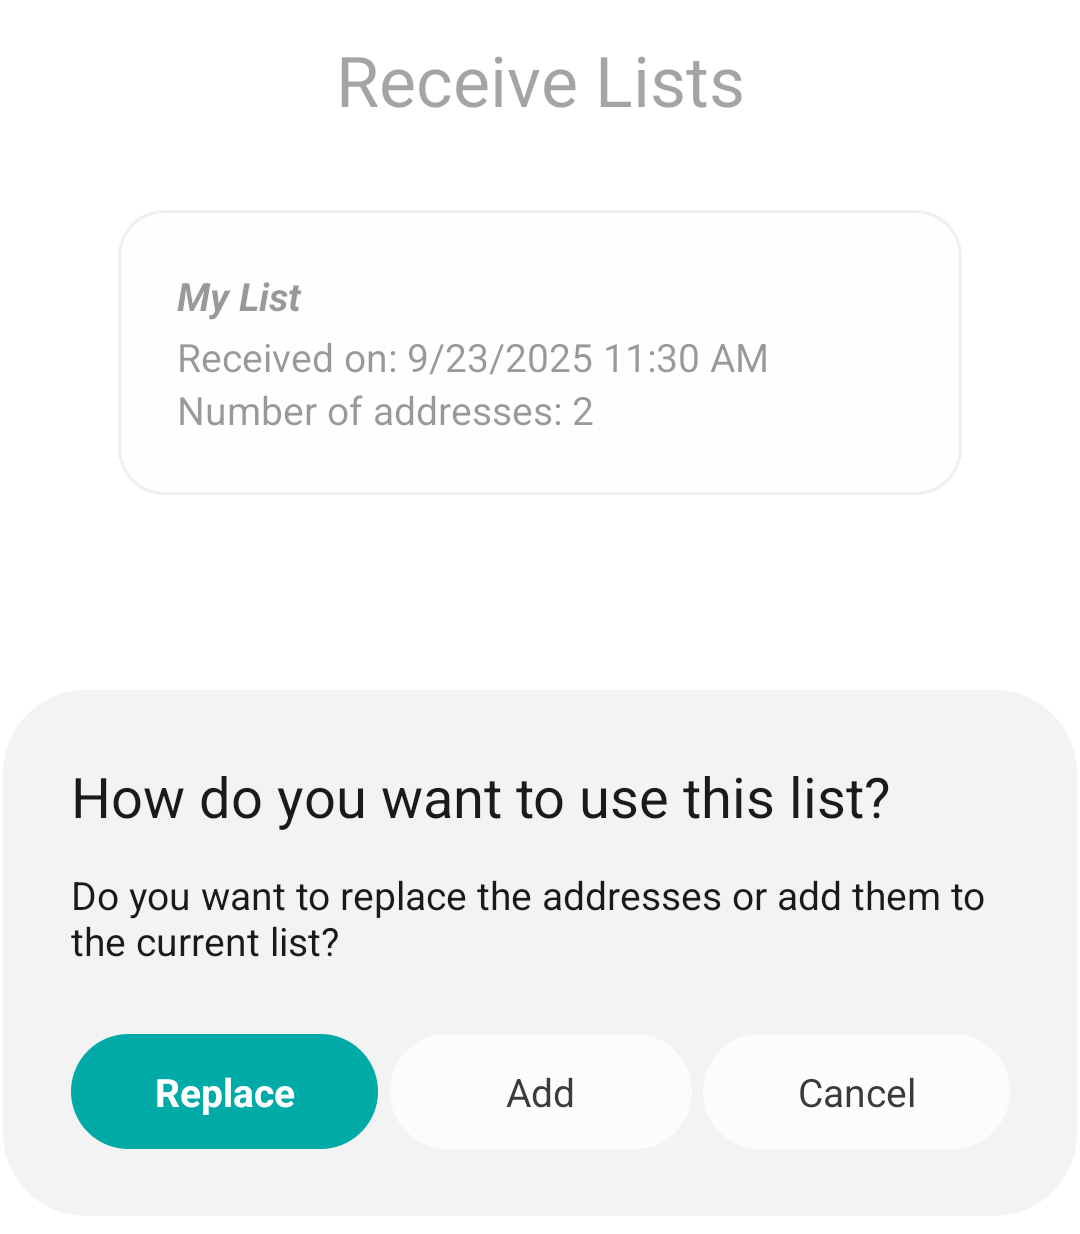
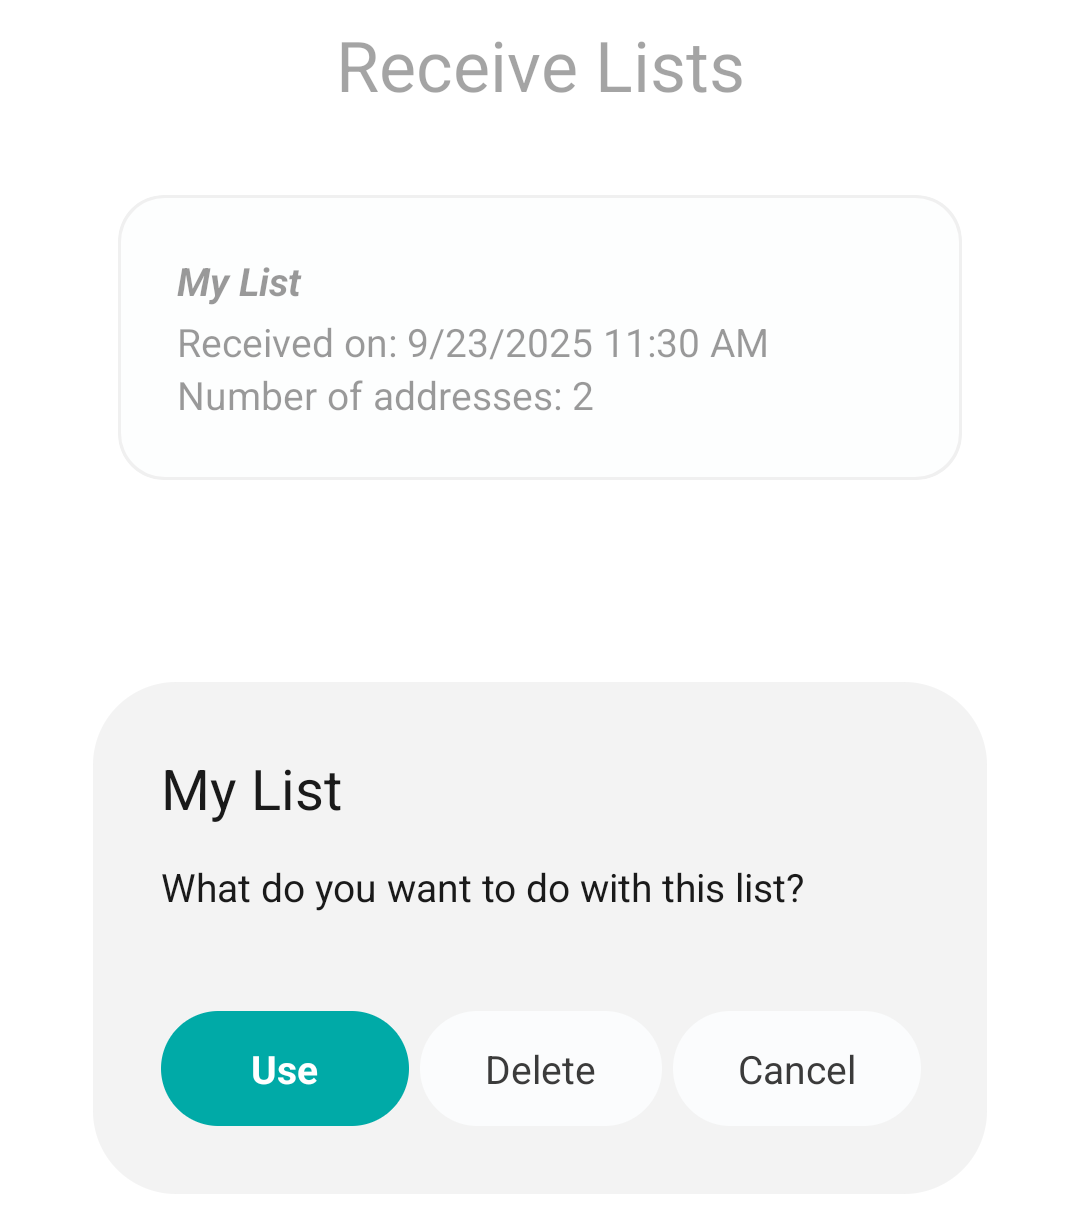
Here you can find the transferred lists, including their name, the date and time it was sent, and the amount of addresses stored within.

When clicking on a received list, you can choose to either USE the list, or DELETE the list.
When choosing to use the list, you are presented with two options, you can either:
- REPLACE your current list with this transferred list of addresses. This will delete this transferred list from your receive lists screen.
- ADD this list of transferred addresses to your current list. This will not delete this transferred list from your receive lists screen.